Changing the foglight bulbs on a MK2 Ford Focus.
Following on from my post about changing the headlight bulbs, I got carried away and thought I would have a go at the front foglights as well.
Let me start by thanking Benjol for his excellent blog on changing the bulbs on the Mk1 Focus, which gave me the inspiration to try and do the same for the MK2. I hope he doesn't mind if I do this.
What you will need
- A Ford Focus Mark 2 (September 2004 onwards for the UK market, others may vary)
- Replacement Bulb(s)
- A medium sized flat-headed screwdriver (for easing off clips)
- A T25 Torx wrench...
- Plenty of light (preferably daylight but you may need a torch/flashlight as well)
- Lots of Patience! (You will need a good hour if doing both sides)
Disclaimer
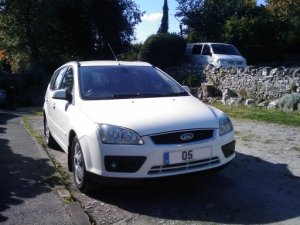
This blog illustrates carrying out the work on a Right Hand Drive UK spec 2005 Ford Focus Diesel Estate. It worked for me, but certain US / European models may vary in some details.
Warnings
-
The trim surrounding and covering the front foglights is made from a fairly soft plastic. It is very easy to damage or mark this if you are not careful.
-
Don't touch the new bulb with your greasy fingers (but you knew that already). Oh, it's the see-through end you mustn't touch...
The Victi... I mean car!
The Right hand one...
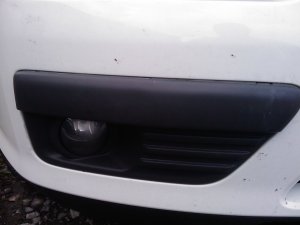
The black trim that covers the fog lights is in two pieces, split top and bottom. The two pieces are held on by clips through the bumper. I found that it is easiest to start with the top piece.
Get hold of the bottom edge of the top piece of trim and pull up and out. You may need to get the blade of a screwdriver in there to start with, before you can get your fingers in there to get a good purchase. You will need to pull quite hard, but at the same time try to be careful otherwise you will break the clips. You should find that the bottom edge unclips and comes away, at which point you can gently persuade the top clips to follow.
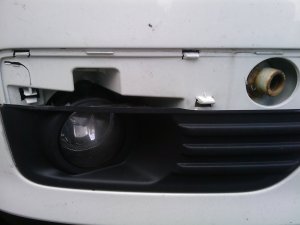 |  |
From the photos, you can see where the clips for the trim are located. This is more than I had, 'cos when the trim is on you have to guess! I found that if you pull from the center of both the top and bottom trim pieces, that helps persuade the clips at the sides to come free. The bottom clips on the bottom trim are easier to release if you pull slightly upwards as well. I had to resort to sticking a flat screwdriver blade in the edges of the trim to persuade some of the clips to release, but it is very easy to mark or damage the trim that way so be very careful.
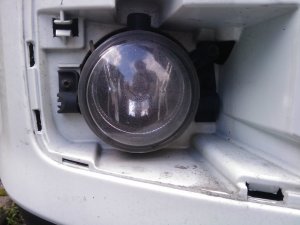 | 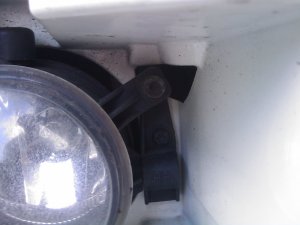 |
In the above pictures you can see the retaining screws for the foglight. These are T25 Torx screws, and they do not have a slot for a flat-bladed screwdriver, so you really need a Torx wrench. The one on the left as you look at it is straightforward, but on the right (inner side) of the foglight there are two screws. The top one is for adjustment only, so you do not have to touch this one. The bottom one is the one that releases the foglight.
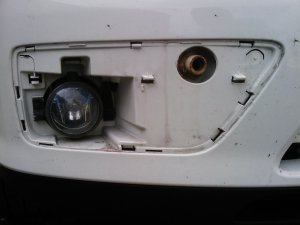
Undo the two screws, and then withdraw the foglight assembly from the bumper. It is not heavy so you can let it gently hang down off the wire.
As you look at the light hanging down, take hold of the unit in one hand and the bulb and connector in the other. Rotate the bulb and connector a quarter turn anti-clockwise with respect to the unit, and this should release the clips so you can withdraw the bulb.
In the second picture above, the clip that you can see on the top releases the wiring plug from the bulb. Press the clip and pull off the plug.
Refitting
Replace the bulb on the wiring plug, and then refit it to the foglight assembly. I found it quite fiddly to get the bulb to fit back in as the tabs on the bulb body are not the same size, so it only fits into the assembly one way. Turn the bulb clockwise with respect to the foglight assembly to lock into place.
Then offer up the assembled unit to the bumper and re-attach the screws. To replace the trim, start with the bottom piece, and locate the bottom clips first. you will have to be quite aggressive in getting all the clips to seat properly, my neighbours wondered why I kept hitting the front of the car with my fists!
All done, and the lights work!
The Left hand one...
There is no point doing a detailed description of the left-hand foglight, as it is merely a mirror image of the right-hand one, and the above instructions hold good for both.
I hope you found this useful, please let me know if you think I missed anything.